Excited to embark your spinning adventures, but not sure where to start? Jumping in – quite literally – feet first is the best way! In this post we will discuss everything you need to know when learning how to spin yarn.
How to Spin Yarn
Writing this post I am assuming that you are learning on a spinning wheel. If you are learning on a drop spindle, you’ll want to head over and read this post on How to Use a Drop Spindle instead.
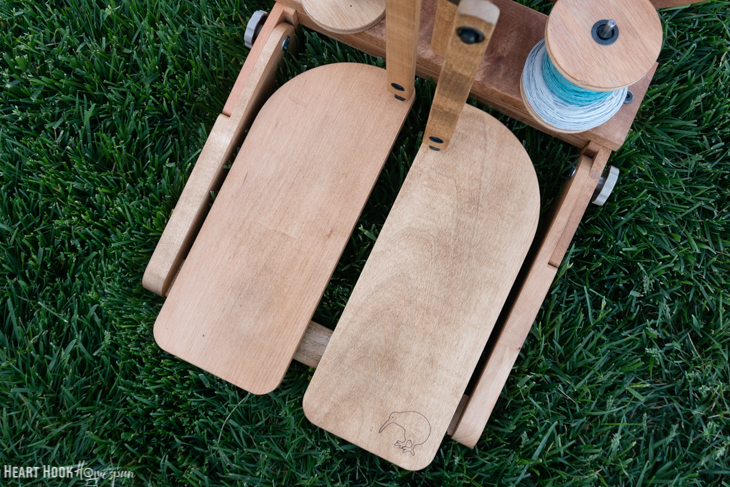
If you are BRAND NEW to spinning on a spinning wheel, the first thing you need to do will sound a bit counter-intuitive: treadle air. That’s right, I want you to sit down, take your shoes off, and treadle and treadle without spinning a single fiber. And then I want you to treadle some more. Treadle until you are so comfortable with your wheel, that you can stop it without using your hands, and you can also start the wheel in motion going in either direction – also without using your hands. This will take practice, but your future spinning self will thank you for it!
Tips for treadling:
Try to keep your toes flat. By flexing your ankle instead of the toe, you have more control over the wheel.
You can tell which way the wheel will turn by looking at your footman (the stick/rod that attaches to the wheel hub). If the footman is positioned to the right of center, you will be spinning the wheel to the right (clockwise), or a Z twist. Conversely, if the footman is positioned to the left of center, you will be spinning the wheel to the left (counterclockwise), or an S twist.
Preparing the wheel for spinning:

First you’ll want to get a fresh bobbin and a long piece of yarn. (This can be any yarn really, we’re only using it as a “leader” to get the bobbin started.)

Fold the yarn in half and secure around the bobbin to create the leader. Make sure that it is secure.

Thread the leader yarn over the top of the hooks (or through the yarn guide like mine) on one arm of the flyer. Hook it with your threading hook and pull it through the orifice – if there is one.

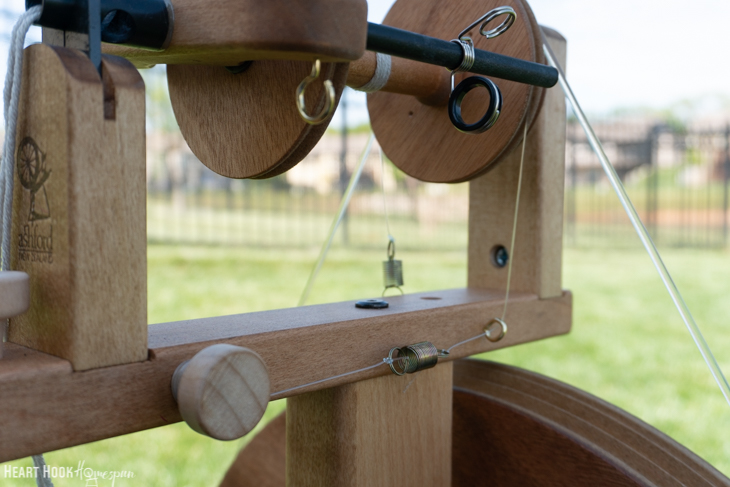
Test the tension:
Put the bobbin break on the bobbin and test it to see if the tension is good. (The fishing line below.) To do this, simply start treadling, building up twist in the leader yarn. Signs of a good tension include:
1. The bobbin should take up the leader, but without so much force that it rips it out of your hand.
2. You should also be able to pull the leader back out again without much effort, and when you stop pulling, the bobbin should start taking up the leader once again.
If you can not pull the leader back off the bobbin (while maintaining a slow spin), your tension may be a bit too tight. Also, if you hear a noise (rubbing) this can also be a sign of too much tension. Simply loosen the bobbin break a bit and try again.
If you don’t have enough tension, the bobbin will not take up the leader. Instead you will notice that the leader yarn simply spins and starts to kink, simply hanging there. In this instance you should tighten your bobbin tension and check that the yarn/leader has not been inadvertently caught on a hook or is otherwise hindered.

Getting started:
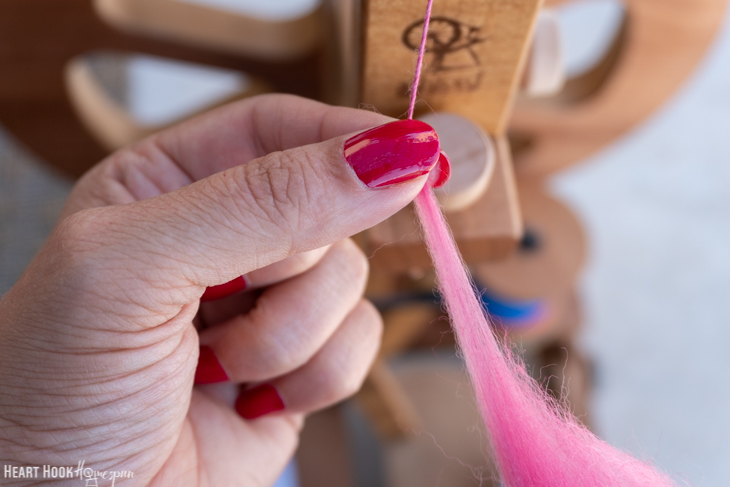
Before starting to spin, decide which hand you will use to control the twist (this will be your forward hand) and which you will use to control the fiber (this will be your back hand).
Learn with clean, prepared roving. This post on Best Fiber for New Spinners has a bunch of great options.
As most singles are spun using a Z twist and the plied with an S twist, start the wheel going in a clockwise motion. (Read more about wheel direction and why it matters here.)
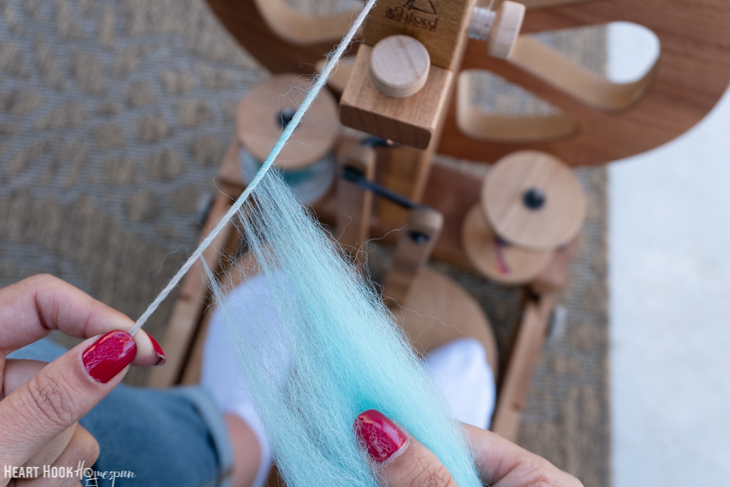
Join the leader to the fiber supply by perpendicularly introducing the little flyaway fibers into the twist on the leader, letting the twist build up a bit. With your front hand gently pull forward from the fiber supply – but not so much that it breaks. This just takes practice, so take it slow at first. Go at a speed that YOU feel in control. If your tension is good per the tips above, the newly twisted yarn should gently pull from your hand. Allow the wheel to do the work.
Try not to slide/rub your hand down the length of the fibers. Rather pinch, draft a bit of fiber from the fiber supply and release, pinch, draft a bit of fiber and release, letting the spun yarn feed onto the bobbin.

Things to remember:
Keep your hands constantly moving. If your hands stop moving without stopping the wheel, you risk building up so much twist that it shoots up into the fiber supply.
The fiber is controlled by the back hand, and only the triangle at the end of it is what you want to pull from and introduce to the twist. Read more about how to achieve consistent spinning here.
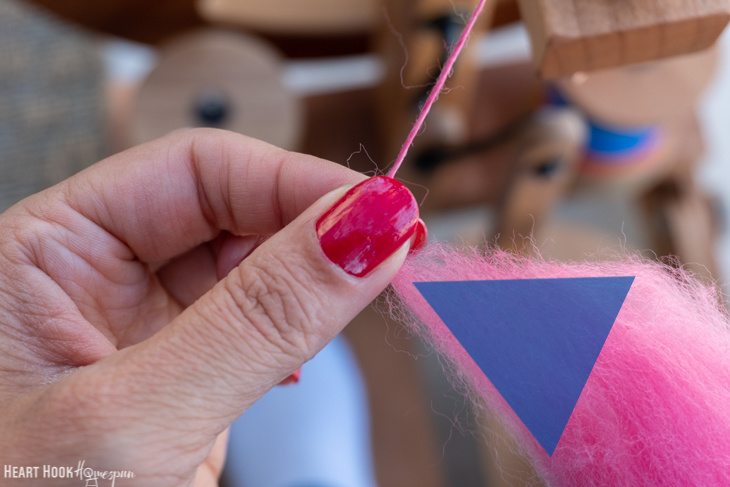
Twist will jump over the thick parts and build up in the thin parts. Practicing consistent drafting will help to keep this from happening.
How much fiber is in drafting zone directly relates to how thick the yarn will be. Don’t forget that your finished yarn will be at least twice the thickness of the single, after plying.
A little extra twist is better than not enough. When plied, a bit of the twist will be removed.
If the wheel is spinning much more quickly than your hands are, it will build up so much twist that you either get overspun yarn (see below) or you will not be able to control how that twist transfers to the fiber source and you end up with a thick mess. Remember to take it slowwwww. (Yes, I know I’ve said that multiple times – it’s important!) The worst that will happen is that the wheel is moving so slowly that you’ll have to wait for the right amount of twist to build before allowing it to feed onto the bobbin.

Checking your twist:
The freshly spun yarn should be soft and bouncy, and not super kinky when let hung loose. To check the amount of twist in your handspun, you can do what is called a ply back test. Simply pull a bit (20″ or so) of the freshly spun yarn back out of the orifice, double it back on itself and let it hang. If it hangs nice and straight without having too many kinks, chances are you have spun a nice single.
I hope this helps, and should you have any questions, or if you’d like some feedback, be sure to join the Heart Hook Homespun Spinners group on Facebook!

More for you:
How to Draft Fiber for a More Consistent Yarn
What is Staple Length and Why it Matters
Janet Pinkelman says
Thank you so much for this informative video. As a first time spinner, it was so helpful.
Victoria says
Thank you for a very informative site without ads!! I really appreciate it. Do you have an article on how to ply? Your article links jump from starting to setting.
Anne says
I’ve been spinning for about 12 years.
If You want to knit your finished yarn, spin singles with a Z-twist and ply with the S-twist.
If You want to crochet your finished yarn, spin singles with the S-twist and ply with the Z-twist.
If You crochet this way you’ll never split the yarn while crocheting and the finished product will have a Beautiful Drape.