If you are BRAND NEW to the world of spinning your own yarn, you are in the right place! Welcome!
My name is Ashlea, and I fell in love with yarn when my little brother taught me to crochet about 8 years ago. I have been learning new stitches, designing crochet patterns, and sharing tutorials on my main blog, Heart Hook Home, ever since.
I learned to spin during a 6-week course offered by my local Fiber Arts Guild last year, and I have not been able to stop spinning since. I am now the proud owner of three wheels, a handful of drop spindles, and a questionable amount of fiber. Read more about me here.
I am admittedly still learning myself, so I am excited to be on this spinning adventure WITH you!

Spinning for Absolute Beginners
The most important things to remember when learning to spin are:
1. We are all still learning. (Yes, even the pros)
2. If it feels right to you, and you like the finished product, then you’re doing just fine.
The basic principle of spinning is to take prepared fiber (whether that is from animals, plants, or synthetic) and give it enough twist to keep it from breaking. We can make fancy art yarns, or practice our spinning consistency for a well balanced, lovely hank of handspun.
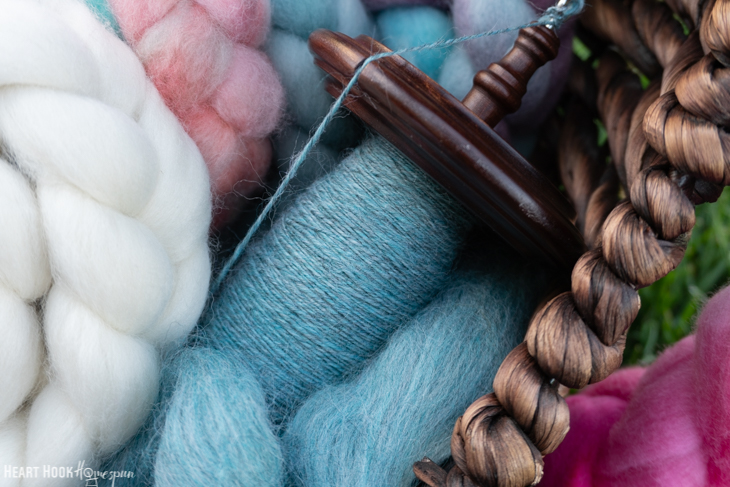
What Fiber?
As a new spinner, you may find that selecting fiber is a daunting experience. It does not have to be! I have compiled a list of the BEST fibers for new spinners, and why.
See: Best Spinning Fiber for Beginners

Spindles or Wheels?
There are conflicting opinions on whether a new spinner should start first with a drop spindle or a spinning wheel. Because each individual learns differently, they will react to the spindle and/or wheel in different ways. No one person can tell you what will work best for you, and the best way to decide is by jumping in head first. Of course, a drop spindle will be a MUCH more cost effective way of trying your hand at spinning.
See: Tips for Choosing a Drop Spindle
See: Great Spinning Wheels for Beginners
How to spin
This post on How to Spin Yarn will help you learn how to start a fresh bobbin, how to draft your fibers, and the general process of spinning.
See: How to Spin Yarn
What do I do when I’m done?
While knitting or crocheting with a single ply of yarn is possible, it is not the norm. For most purposes, you will want to ply your yarn and how do that is up to you!
You could do a simple 2 ply, in which you take two independently spun bobbins and twist them together, in the opposite direction from which they were originally spun. (More on that here.) The colors of the two singles will mingle and play off of each other, hitting at different spots creating a lovely effect. The following yarns are all 2 ply:

If you have a single bobbin with beautiful long color changes that you want to preserve (or if you only have one single bobbin to ply) you will want to try your hand at Navajo (Chain) plying. If you are a crocheter, this works exactly how it sounds. You are making giant crocheted chains from one strand of spun yarn, that you then ply to make a thicker yarn. The following is an example of Chain Ply:

You can see the difference between the two methods. Gorgeous both ways!
See: How to Ply Yarn
See: How to Navajo (Chain) Ply Yarn
Finishing Your Yarn
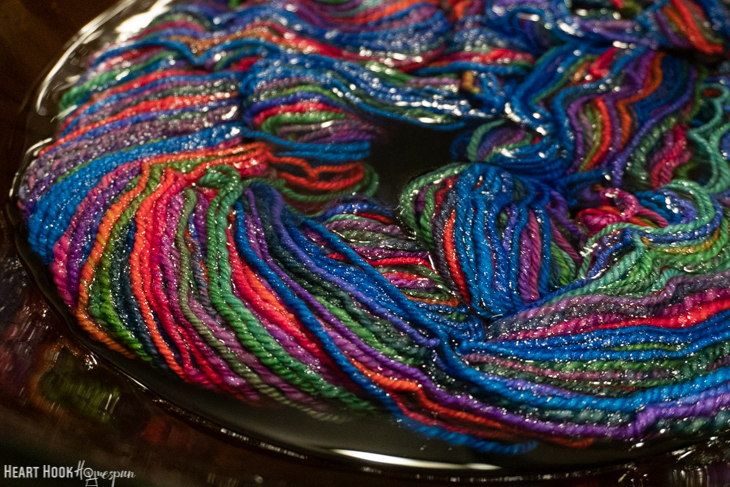
Once you are completely finished spinning and plying your yarn, it is time to set it. The yarn should be wound into a hank and tied. Next you will soak the yarn, and hang it up to dry out of direct sun. Once it’s dry, you’re good to use it in your next project!
See: How to “Set” or Finish Yarn
I hope you enjoy the process of learning as much as I have, and I look forward to creating more with you soon!

